* This is a serger version but these are just as easily made on the sewing machine. Sewing machine version coming very soon.
I've posted a snack bag tutorial before but it's been a couple years... what!? And since then I've made dozens and have refined my skills and techniques. So here we go with a 2nd take (2 1/2 years later) with a lot more pictures and directions.
But first let me tell you why I really love these!
~ I love to save money, be creative and add color to my life where I can.
~ I am directly recycling and using scrap fabrics.
~ These are food safe. I was not comfortable making snack bags out of just fabric, nylon or laminated fabrics because for one, wet or greasy foods would leak through the fabric and nylon. I wasn't getting any good answers from manufactures if the laminated cotton was food safe. Plus let's face it, laminated fabric is expensive!
~ Easy to clean. I frequently will flip them inside out and rinse them under the faucet adding a little soap if needed.
~ These are machine washable! When the fabric gets dirty I half flip them inside out, so the inside and outside of the bags are exposed and toss them in with my towels. I don't use fabric softener in this load. To be perfectly honest they often go in the dryer too. I use a low temp setting and I have never had a problem. Of course putting heat on them may make them emit some horrible chemical but my thinking is when it cools down it goes back to the original state...oh yes, I have spent many moments thinking about all the possibilities! The bags we have now are about 2 years old and are in great condition.
Materials:
Plastic cereal bag
scrap fabrics measuring at least 4" x 7"
3/4" velcro (hook & loop)
threads
Equipment:
Serger
Sewing machine
ruler
scissors (rotary cutter, mat & ruler are helpful)
First grab a plastic bag from a cereal box. I LOVE this stuff. First of all you can't recycle them or at least around here that I know of, so this is a great re-use of a material that won't biodegrade for many years. They come with food packaged in them so you know they are food safe and they are super easy to sew. Sewing some plastics are impossible because once the needle hits it it will tear like you cut it with scissors. This however, holds the stitches just perfectly.
Next cut off the bottom and then cut up the seam line on the side of the bag to open it up flat.
For these snack bags I cut them 4" tall x 7" wide. Out of this bag I was able to get enough for 4 snack bags. The next bag I used I could only get 2 so they will vary.
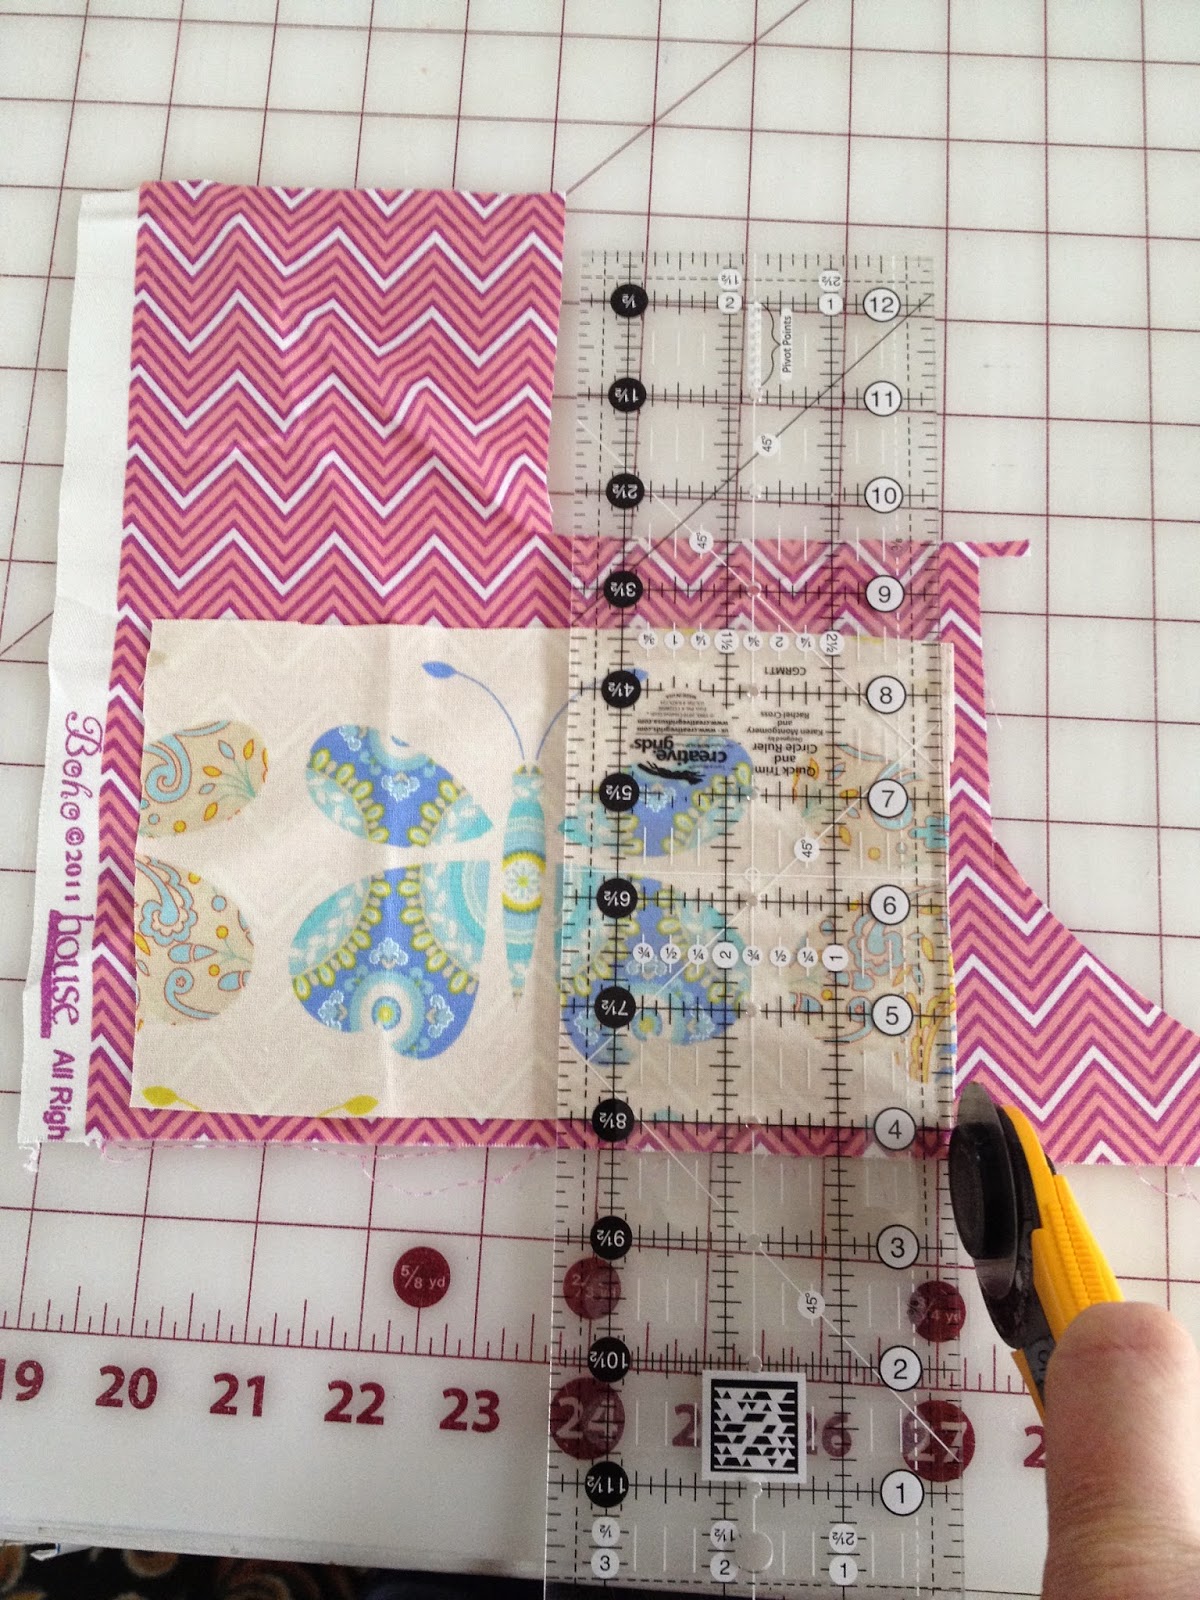
I'm all about cutting corners and taking shortcuts so at this point I'm going to use the plastic I cut out and fussy cut the butterfly out. It's hard to see the cereal bag plastic in this photo. The left side is a little easier to see. I am not concerned about keeping the sides totally straight...the serger will help me straighten them out.
Next I'm using the fussy cut piece to cut out the other side. Now if I had been thinking ahead I would have placed the other fabric underneath when fussy cutting so I could have avoided this step but I can't win them all. And, oh yeah, why not square up the edges...just because I said that I didn't care about it in the previous step.
I cut in half a 3/4" wide piece of hook and loop. The full width makes it a little too strong for little hands to get apart and lets face it if you can get two out of one, why not!?
Ok so time to re-thread the serger. Thought I would add a variety of colors to make it fun.
Grab a piece of plastic and one fabric side, put together and zip through the serger on one long side. Nothin fancy about it. No need to do anything with the tails. Those will be taken care of in the next step. Repeat for the other plastic and fabric piece. *Tip on sewing with the plastic. I always put the plastic down and fabric face up so the feed dogs help pull the plastic through otherwise the plastic will stick to the presser foot and slip across the fabric resulting in a mismatched side.
I cut the length of hook and loop about 1/2" shorter than the width of the snack bag that way it won't get too bulky in the side seam. I stitch it on about a 1/4" down from the top. Stitch across the top.
Pivot and it will take about 3 more stitches down.
Then pivot again and stitch back across the bottom. You'll have to pivot once more on the end.
On the hook side (rougher side) you might find that the thread gets caught and messy. It happens and I just take a deep breath before I start swearing then cut the thread, re-thread the needle and continue on.
Alright hook and loop done.
Now put them insides together, just like it will be when it's done. The hook and loop will hold the top together.
But you will want to hold the sides and bottom together with something. Wonder clips are perfect here but any sort of clip will do, just not pins because you want to avoid putting unnecessary holes in the plastic.
Put your snack bag into the serger starting at a top corner. Run just a couple stitches, leave the needles in the down position then lift the presser foot, grab the tail and....
...swing it all the way over in front of the blade.
Stitch all the way down to the bottom corner. Run it off 1 or 2 stitches. Lift the presser foot and....
...pivot to the bottom edge. Make sure that the needles will start right at the corner. Repeat for the next bottom corner.
Serge all the way to the last top corner and run off 1 stitch.
Lift the needles and the presser foot.
Then flip over the entire piece carefully - your threads are still attached (you don't want to pull it too far out of the machine) and put it back in on the flip side. Line up the needles so they will start serging right back at the top. *It's important to lift the blade before you start serging again because you don't want to chance cutting your stitches. (Please ignore the horrible nails.)
Serge down about 1 1/2" and run off the side.
Snip all your threads and your done!